Electrolysis
Begin the experiment
This experiment introduces you to the electrolytic cell. The electrolytic cell and the voltaic cell are closely related. Each has two electrodes; an anode and a cathode. In each, oxidation occurs at the anode and reduction occurs at the cathode. Where they differ is in the nature of the chemical reactions.
In the voltaic cell, the chemical reactions are spontaneous and act to flow electrons through an external circuit to produce work. Batteries that power our many electric devices are voltaic cells.
In the electrolytic cell, the chemical reactions occur because electrons flow into the cell from an external circuit. Examples include electroplating, where metals are deposited through reduction, and the production of gasses such as hydrogen or oxygen.
Rechargeable batteries are an interesting case in that they are voltaic cells while supplying power, and electrolytic cells while being recharged.
The rate at which electrons flow through an electric circuit is called the current and is measured in Amperes (abbreviated as A). The number of electrons that flow through a circuit is called the charge and depends on the current and the duration of the flow. Charge is measured in Coulombs (abbreviated as C). An electron flow of one ampere for one second is one coulomb.
1 C = 1 A-sec
The number of coulombs of electrons passing through a circuit equals the current flow in amperes multiplied by the duration of the current flow in seconds.
1 C = 1 A-sec
The number of coulombs of electrons passing through a circuit equals the current flow in amperes multiplied by the duration of the current flow in seconds.
The coulomb is a measure of charge. Another unit that can be used to measure charge is the Faraday (abbreviated as  ). The Faraday is a more useful unit for chemists in that it represents the charge of one mole of electrons.
1 = 96485 C per mole of electrons
For example, one mole of solid silver can be produced when one Faraday of electrons pass through a Ag+ solution. In a solution containing Al3+ ions only 1/3 of a mole of Aluminum is produced.
). The Faraday is a more useful unit for chemists in that it represents the charge of one mole of electrons.1
= 96485 C per mole of electronsFor example, one mole of solid silver can be produced when one Faraday of electrons pass through a Ag+ solution. In a solution containing Al3+ ions only 1/3 of a mole of Aluminum is produced.
In this experiment you will determine the value of the Faraday constant by measuring the amount of charge needed to reduce one mole of H+ according to the following reaction.
2H+(aq) + 2e- → H2(g)
You will also determine the value of n on the copper ion formed, Cun+.
2H+(aq) + 2e- → H2(g)
You will also determine the value of n on the copper ion formed, Cun+.
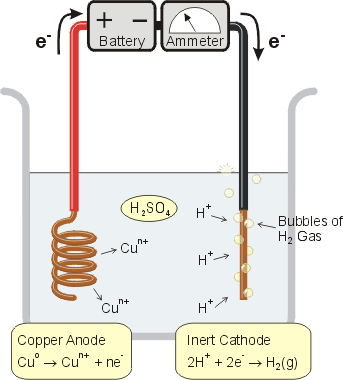
You'll accomplish this using an electrolytic cell similar to that shown to the left.
A battery (or other power supply) is the source of electrons. The electron current is measured by an ammeter in amperes. Oxidation takes place at the anode and copper atoms leave the electrode and become copper ions in solution. Reduction takes place at the cathode and hydrogen ions gain two electrons to form hydrogen gas which you'll collect and measure.
A battery (or other power supply) is the source of electrons. The electron current is measured by an ammeter in amperes. Oxidation takes place at the anode and copper atoms leave the electrode and become copper ions in solution. Reduction takes place at the cathode and hydrogen ions gain two electrons to form hydrogen gas which you'll collect and measure.
By recording the electric current during the experiment, you can determine how many coulombs of electrons passed through the cell.
The volume of the collected hydrogen gas can be converted to moles of hydrogen gas via the ideal gas law, PV = nRT. Finally, knowing the molecular weight of copper, the loss in mass of the anode can be used to determine the moles of copper metal converted to copper ions. Comparing the moles of electrons to moles of copper atoms will determine the value of n in the charge of the ion.
Finally, you can calculate two estimates of the Faraday constant by comparing the moles of hydrogen gas and of copper atoms to the moles of electrons used.
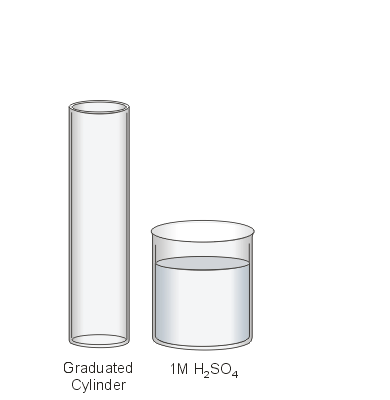
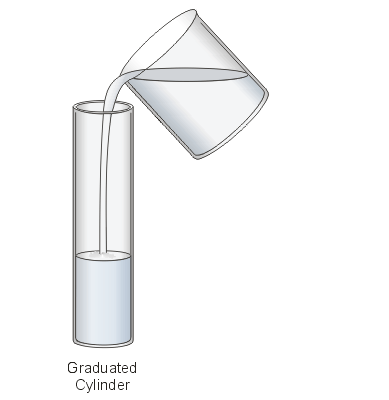

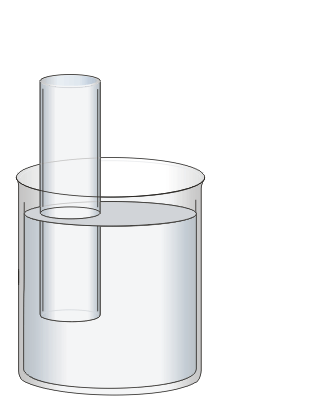
In this experiment you will use 1 M sulphuric acid (H2SO4) as your electrolyte both to carry the current between the electrodes and as a source of H+. A graduated cylinder is filled with the solution and sealed with a rubber stopper.
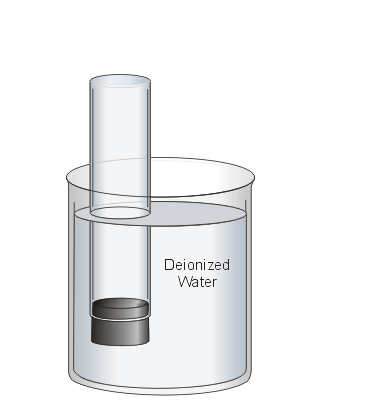
The graduated cylinder is inverted and immersed in a beaker of deionized water. Once the stopper is removed, the column should remain full of liquid. During the experiment, this inverted cylinder will be used to collect the generated hydrogen gas for measurement.
The graduated cylinder is inverted and immersed in a beaker of deionized water. Once the stopper is removed, the column should remain full of liquid. During the experiment, this inverted cylinder will be used to collect the generated hydrogen gas for measurement.
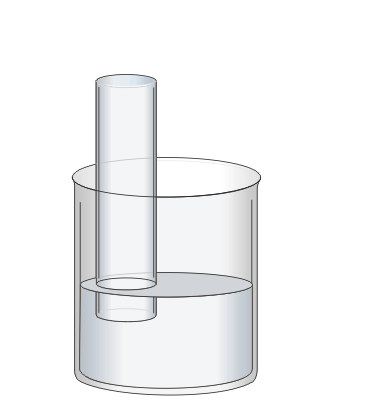
In the previous step the beaker was filled with water to protect your fingers from the sulphuric acid when the stopper is removed.
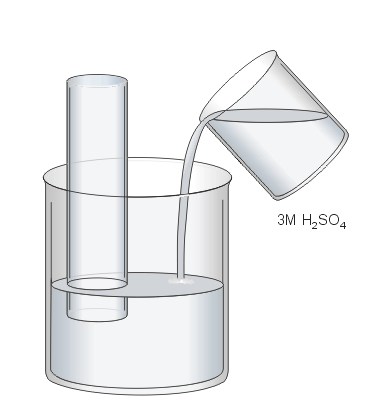
Now the water will be acidified by emptying the beaker until about 200 mL of water remain. The beaker is then topped off to 300 mL using 3M sulphuric acid solution. This results in the 3 M solution being diluted to a 1 M solution.
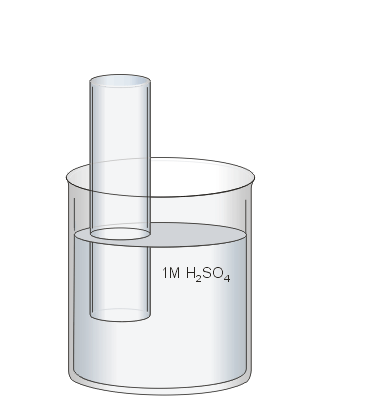
At this point you are ready to add the electrodes and begin the electrolysis.
Now the water will be acidified by emptying the beaker until about 200 mL of water remain. The beaker is then topped off to 300 mL using 3M sulphuric acid solution. This results in the 3 M solution being diluted to a 1 M solution.
At this point you are ready to add the electrodes and begin the electrolysis.
Before you begin the electrolysis you need to weigh the anode which has been cleaned and dried.
During the experiment the anode will become lighter as copper atoms are oxidized and enter the solution.
Determine the mass of the anode to 4 decimal places using the benchtop scale. When you have recorded the anode's mass in your lab book press the 'Done Weighing' button.
During the experiment the anode will become lighter as copper atoms are oxidized and enter the solution.
Determine the mass of the anode to 4 decimal places using the benchtop scale. When you have recorded the anode's mass in your lab book press the 'Done Weighing' button.
The apparatus is now assembled and you are ready to attach the electrodes to the current source.
The spiral anode is connected to the red, six volt terminal and the cathode is connected to the black, ground terminal.
Choose the 'Wiring' button (top of the display) that will connect the electrodes to the power supply in the correct manner.
The spiral anode is connected to the red, six volt terminal and the cathode is connected to the black, ground terminal.
Choose the 'Wiring' button (top of the display) that will connect the electrodes to the power supply in the correct manner.
Now that the electrodes are connected to the power supply you can begin the electrolysis process. Hydrogen will form at the cathode and the anode will oxidize to copper ions. The hydrogen formed is captured in the cylinder where you can later measure its volume.
The electric current passing through the cell varies slowly and you need to record its value at 3 minute intervals over the course of the experiment.
When you are ready to begin, press the power supply's 'On' button.
The electric current passing through the cell varies slowly and you need to record its value at 3 minute intervals over the course of the experiment.
When you are ready to begin, press the power supply's 'On' button.
If you look at the electrolysis cell you'll see that hydrogen is being produced at the spiral electrode. This means that you've attached the electrodes backwards.
Turn off the power supply. Remove the wires and reattach them in the opposite manner; black to the left and red to the right.
The clock on the power supply will be reset to zero. When you are ready press the 'On' button.
Turn off the power supply. Remove the wires and reattach them in the opposite manner; black to the left and red to the right.
The clock on the power supply will be reset to zero. When you are ready press the 'On' button.
While the experiment is proceeding, remember to record the current at three minute intervals. We will use these current values to determine an 'average' current for the purposes of calculating the number of coulombs of electrons passing through the cell.
If this experiment were being conducted in a physical laboratory, it would take about 45 minutes to complete. Since this experiment is being simulated in a computer, we will take some liberties and speed up the passage of time by 4X.
Remember to keep recording the current at three minute intervals according to the simulated clock.
After 35 minutes have passed you can stop the electrolysis any time by pressing the 'Off' button. At 45 minutes the simulation will stop automatically. The end time needs to be recorded for the analysis.
The electrolysis has produced a volume of hydrogen gas which is trapped in our graduated cylinder. Your next steps will be to measure both the volume of the hydrogen gas, and the height of the liquid column in the graduated cylinder.
The liquid column acts to reduce the pressure of the hydrogen thereby increasing its volume.
Use the 'Measure Liquid Column' and 'Measure H2 Volume' buttons to perform the measurements.
The liquid column acts to reduce the pressure of the hydrogen thereby increasing its volume.
Use the 'Measure Liquid Column' and 'Measure H2 Volume' buttons to perform the measurements.
The hydrogen that was produced by electrolysis has been captured in a graduated cylinder. Because we are using the graduated cylinder upsidedown, the scale starts at zero mL at the top and increases downwards.
Read the hydrogen gas volume to the nearest 0.5 mL. Also be certain to record the ambient pressure and temperature. These factors influence the measured volume of the hydrogen gas.
Press the 'Done Measuring Volume' button when you are done.
Read the hydrogen gas volume to the nearest 0.5 mL. Also be certain to record the ambient pressure and temperature. These factors influence the measured volume of the hydrogen gas.
Press the 'Done Measuring Volume' button when you are done.
After collecting the hydrogen gas, a column of liquid remains inside the graduated cylinder. If this liquid column extends above the liquid level in the beaker, the pressure of the hydrogen gas is reduced.
A ruler has been placed beside the graduated cylinder. The zero mark of the ruler is level with the top of the liquid in the beaker. Measure the column height to the nearest millimeter.
Press the 'Done Measuring Height' button when you are done.
A ruler has been placed beside the graduated cylinder. The zero mark of the ruler is level with the top of the liquid in the beaker. Measure the column height to the nearest millimeter.
Press the 'Done Measuring Height' button when you are done.
Complete your measurements of the hydrogen gas volume and the liquid column height.
The final quantity that needs to be measured is the mass of the anode. Use the 'Weigh Electrode' button to do this.
Weighing the anode requires that the apparatus be disassembled. Once you weigh the anode you'll be unable to measure the hydrogen volume or liquid column height so make sure you record these values first.
Weighing the anode requires that the apparatus be disassembled. Once you weigh the anode you'll be unable to measure the hydrogen volume or liquid column height so make sure you record these values first.
The anode has been removed and carefully dried in an oven. Weigh the anode in order to determine the change in mass of this electrode over the course of the experiment.
When you press 'Done Weighing' you will investigate whether the collected gas is flammable.
When you press 'Done Weighing' you will investigate whether the collected gas is flammable.
The graduated cylinder has been carefully removed from the apparatus and brought to the fume hood. Press 'Ignite Gas' to insert a burning splint into the mouth of the cylinder. You can replay the test using the 'Replay Ignition' button.
Record your observations and then press 'All Done' to complete the experiment.
Record your observations and then press 'All Done' to complete the experiment.

 Next
Next Skip
Skip
Loading Assets..0%